

Sublocation Settings
Configure everything about how a sublocation operates: hours, payments, ordering, notifications, hardware, and more
Each sublocation has its own settings, configured from within that sublocation's workspace. Settings control how the sublocation behaves at the operational level: opening hours, how orders are organised, what payments are accepted, what the customer sees, how staff are notified, and which hardware (terminals, KDS, Wallet Tickets, mobile apps) is connected.
Navigating to sublocation settings
To open Sublocation Settings:
- From the main sidebar, select Locations.
- Open a location, then click the sublocation card you want to configure.
- Open the Sublocation Settings entry point on the sublocation workspace.
Settings open as a modal.
The settings categories
The left sidebar is dynamic: product-only, service-only, hybrid, limited-mode, and preview-enabled sublocations can show different tabs. In the normal full view, tabs appear in this order when applicable:
- General: name, parent location, description, inherited timezone, currency, and receipt/invoice language, the Services & Products the sublocation offers, Floor Plans and Waiting Room for service-capable sublocations, and SMS receipts.
- Order Profiles: a Private Preview tab shown only to eligible organisations.
- Hours: operating hours per weekday.
- Location: sublocation address. By default the sublocation inherits the parent location's address. Toggle Use Custom Address to override.
- Appearance: override the organisation's theme for this sublocation. The override only applies to iPad, iPhone, Android, and card reader interfaces, not the desktop dashboard.
- Payments: Stripe account, tax setting, payment-collection toggles, and service charges. Required to take payments. See Payments below.
- Discounts: create discount rules specific to this sublocation, via + Add Discount.
- Notifications: the demo shows Email Notifications for booking confirmations and updates. It does not currently show an SMS Notifications control.
- Security: require a numeric passcode for staff to switch into this sublocation on the mobile app. Useful where multiple sublocations share devices.
- Mobile App: controls which tabs and home sections appear in the mobile app for this sublocation. Useful where staff share devices across sublocations. See Mobile App below.
- Wallet Tickets: shown for service-capable sublocations; generates Apple Wallet and Google Wallet booking tickets when enabled.
- iCal Links: shown for service-capable sublocations; creates revocable calendar subscription links for selected resources.
- Order & Pick Up: shown for product-capable sublocations.
- Order to Table: shown for product-capable sublocations.
- Wastage: shown for product-capable sublocations; enables staff wastage recording for tracked products.
- Order Stages: shown for product-capable sublocations; groups order items into courses or phases.
- KDS Locations: shown for product-capable sublocations; configures kitchen display and printed-ticket routing.
- Reviews: a Private Preview tab for configuring a hosted customer review page.
General settings
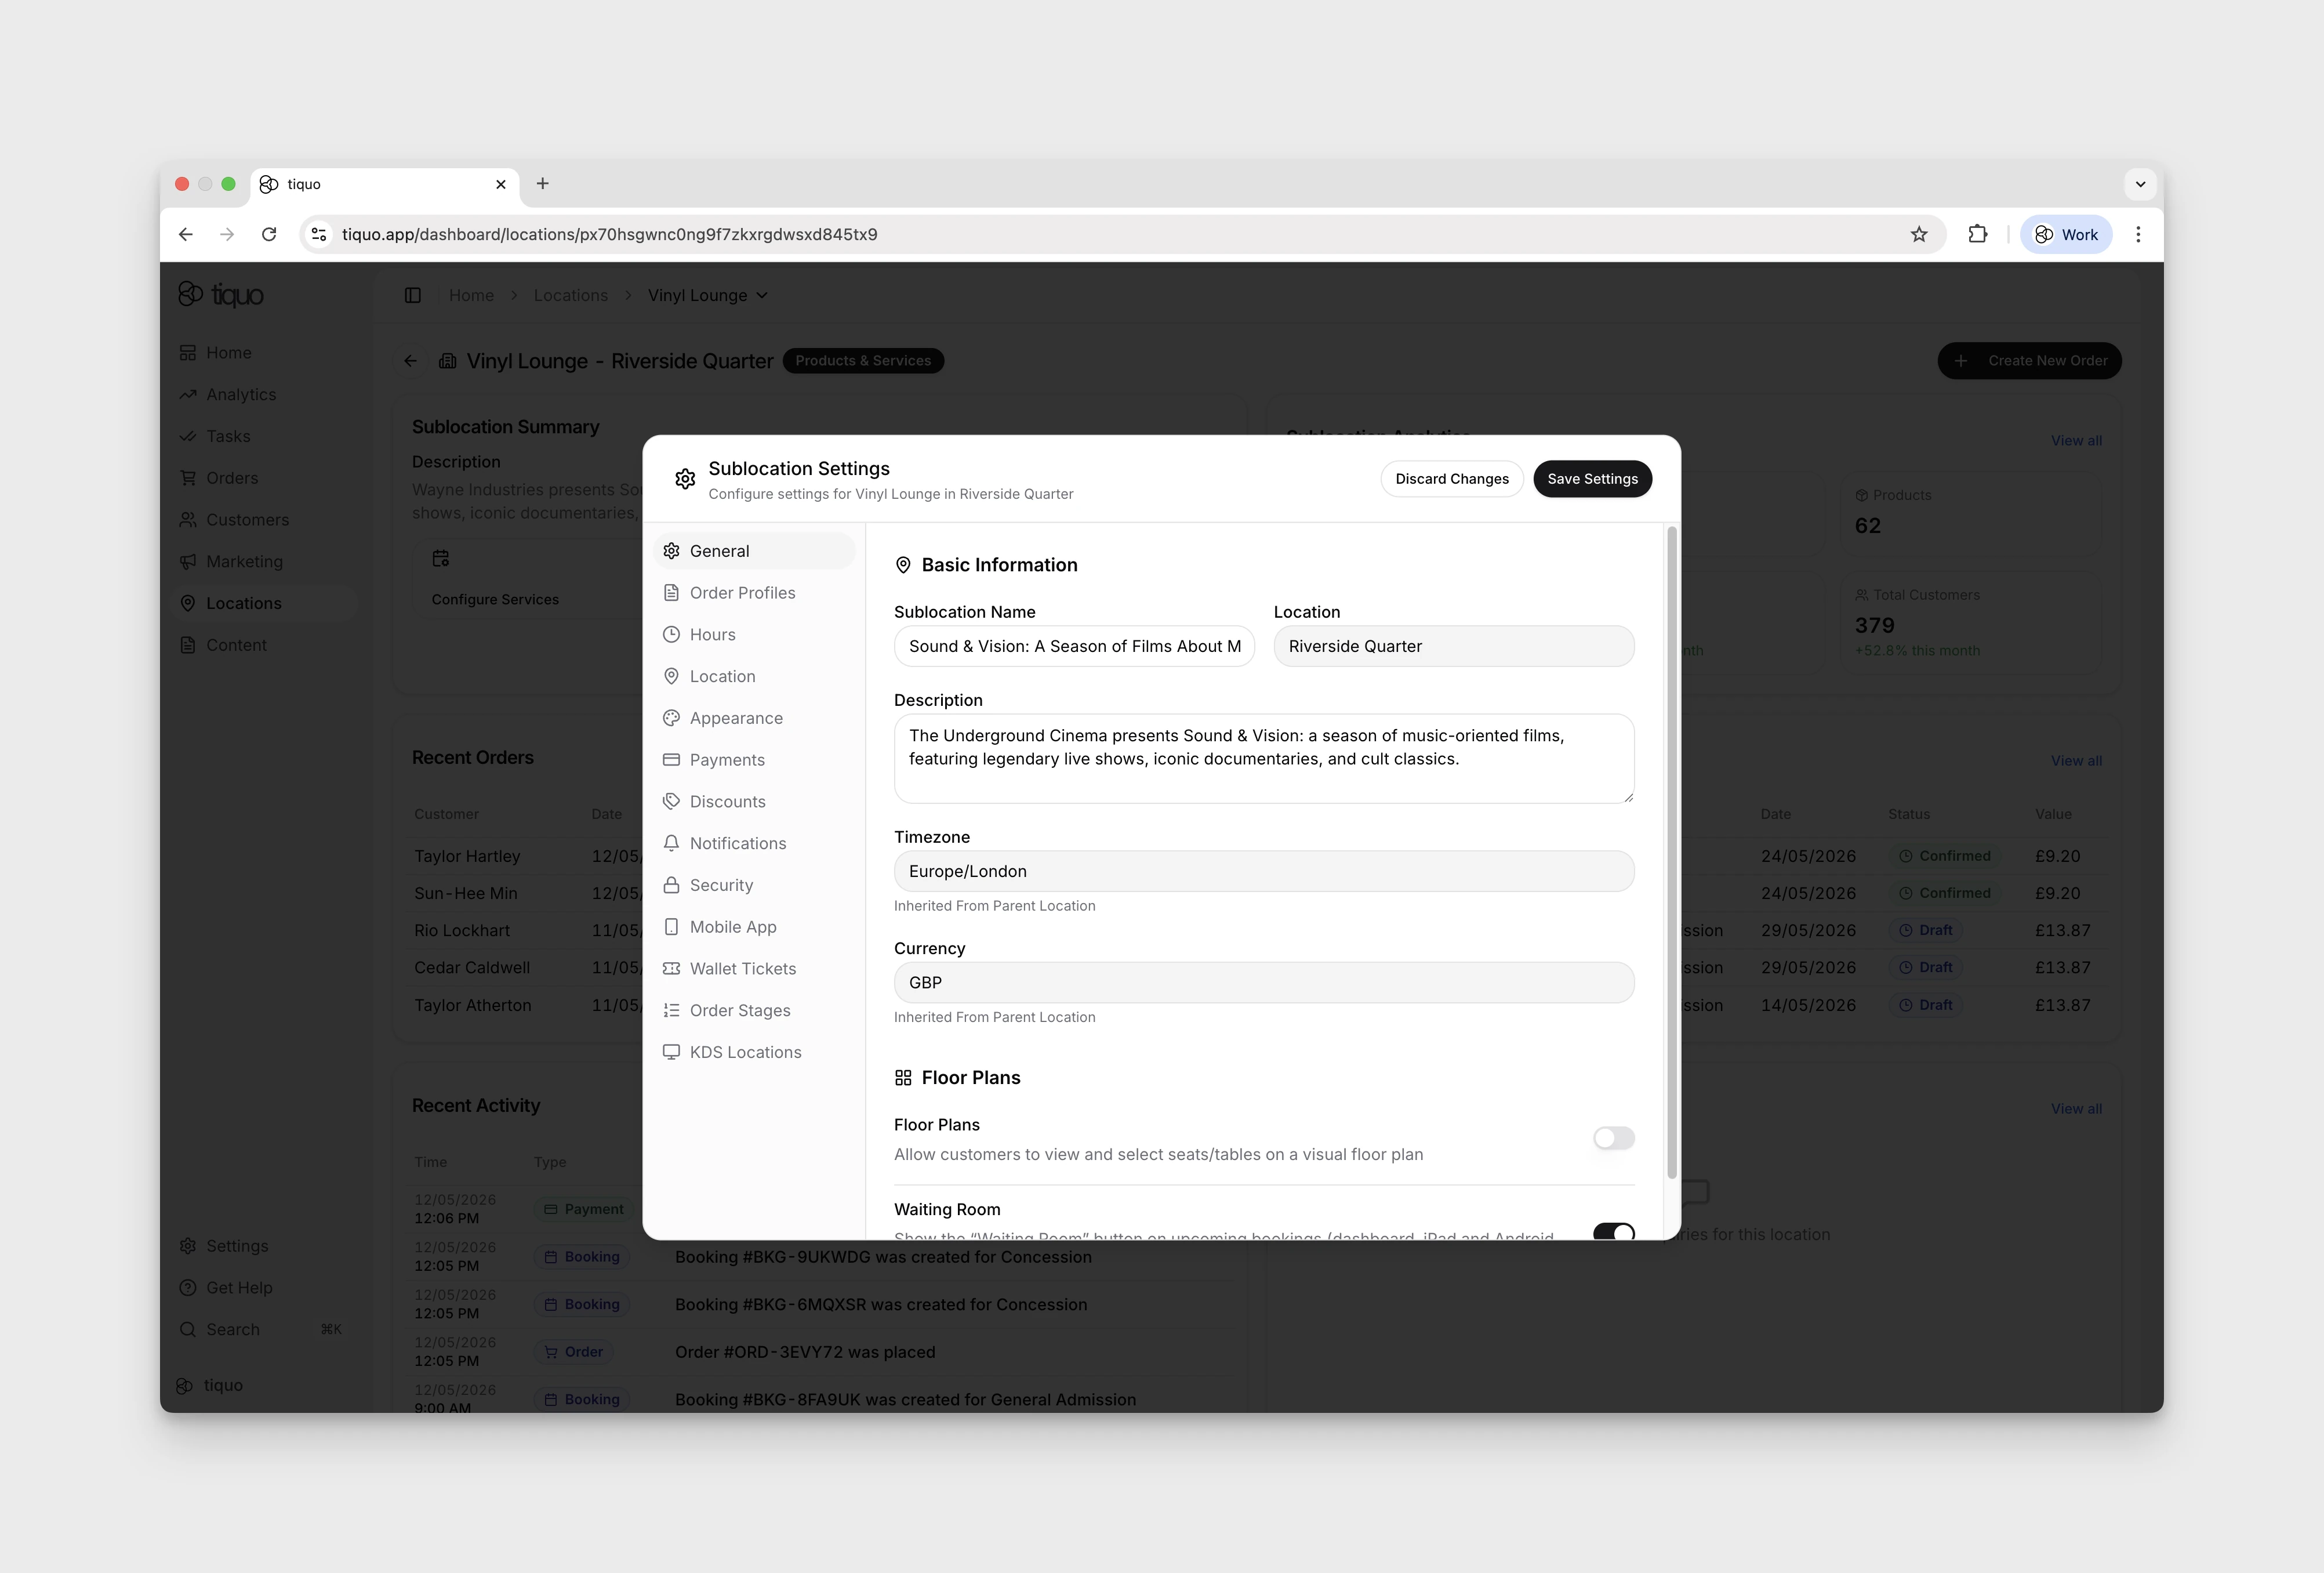
The General tab covers the sublocation's identity and region:
- Sublocation Name: the label shown across the platform (e.g., "Spa & Treatments")
- Location: the parent location the sublocation belongs to
- Description: a short description shown in the sublocation card
- Timezone: inherited from the parent location and displayed read-only
- Currency: inherited from the parent location and displayed read-only
- Receipt & invoice language: inherited from the parent location and displayed read-only
The parent location's country, timezone, and currency are locked after creation. Contact Tiquo support if these values need to change. Sublocations cannot override timezone or currency.
Services & Products
The Services & Products section shows whether the sublocation offers Services (bookings) and Products (POS, online ordering, and kitchen screens), each marked Enabled or Off. Staff with the locations.edit permission, which is needed to open Sublocation Settings, can add the one it does not offer yet:
- Select Enable services or Enable products.
- Read the confirmation. Services and products are each billed per sublocation, so enabling one might increase your Tiquo subscription from your next invoice.
- Confirm with Enable services or Enable products.
The change takes effect straight away: the matching workspace, such as Configure Products, and the product- or service-specific settings tabs become available for the sublocation. To turn services or products off on a sublocation, contact Tiquo support.
A sublocation that offers neither services nor products opens a limited settings view from the Locations page, and that view does not show the Enable buttons.
The Floor Plans and Waiting Room section contains two separate switches:
- Floor Plans: when on, customers can view and select seats or tables on a visual floor plan
- Waiting Room: when on, a Waiting Room button is shown on upcoming bookings in the dashboard, iPad, and Android apps
For product-capable sublocations, Order Creation controls the default staff ordering experience:
- Mode: choose Standard Mode, Restaurant Mode, or Bar Mode. Standard uses the regular order flow. Restaurant uses product-first ordering with tables and kitchen stages. Bar provides the same restaurant, table, and kitchen controls but opens on a fresh order instead of the POS home.
- Open Floor Plan First: in Restaurant or Bar mode, open the floor plan before the product catalogue when a floor plan is available.
- Allow Customer & Company Tabs: let staff create a floating tab associated with a customer or company instead of a table or booking. An order can be associated with either a table/booking or a customer/company tab, not both.
- Allow Unassociated Orders: when off, staff must associate the order with a table, booking, customer, company, or walk-in before sending it.
- Ask about allergens: prompt staff at the start of an order, before payment or saving an open tab, at both points, whenever a product with configured allergens is first added, or not at all. The setting applies to the dashboard, Tiquo App, and Tiquo PDQ.
Staff selection and approval controls
Enable Staff Selection when each till action should be attributed to an operator. Staff can select their name, and a personal four-digit PIN can be required before they become the active operator.
Choose when the PIN is required again: Never, after 15 or 30 seconds, or after 1, 2, 3, 4, 5, 10, or 30 minutes of inactivity. Require PIN after every order clears the active staff member whenever an order workflow finishes.
Permissions determine who can apply discounts or record wastage. Wastage can also require administrator approval. Void reasons are not set per sublocation: every sublocation uses the organisation's list under Settings > Reporting > Default reasons for voiding an item. The chosen reason and the responsible staff member are retained in order history.
Payments
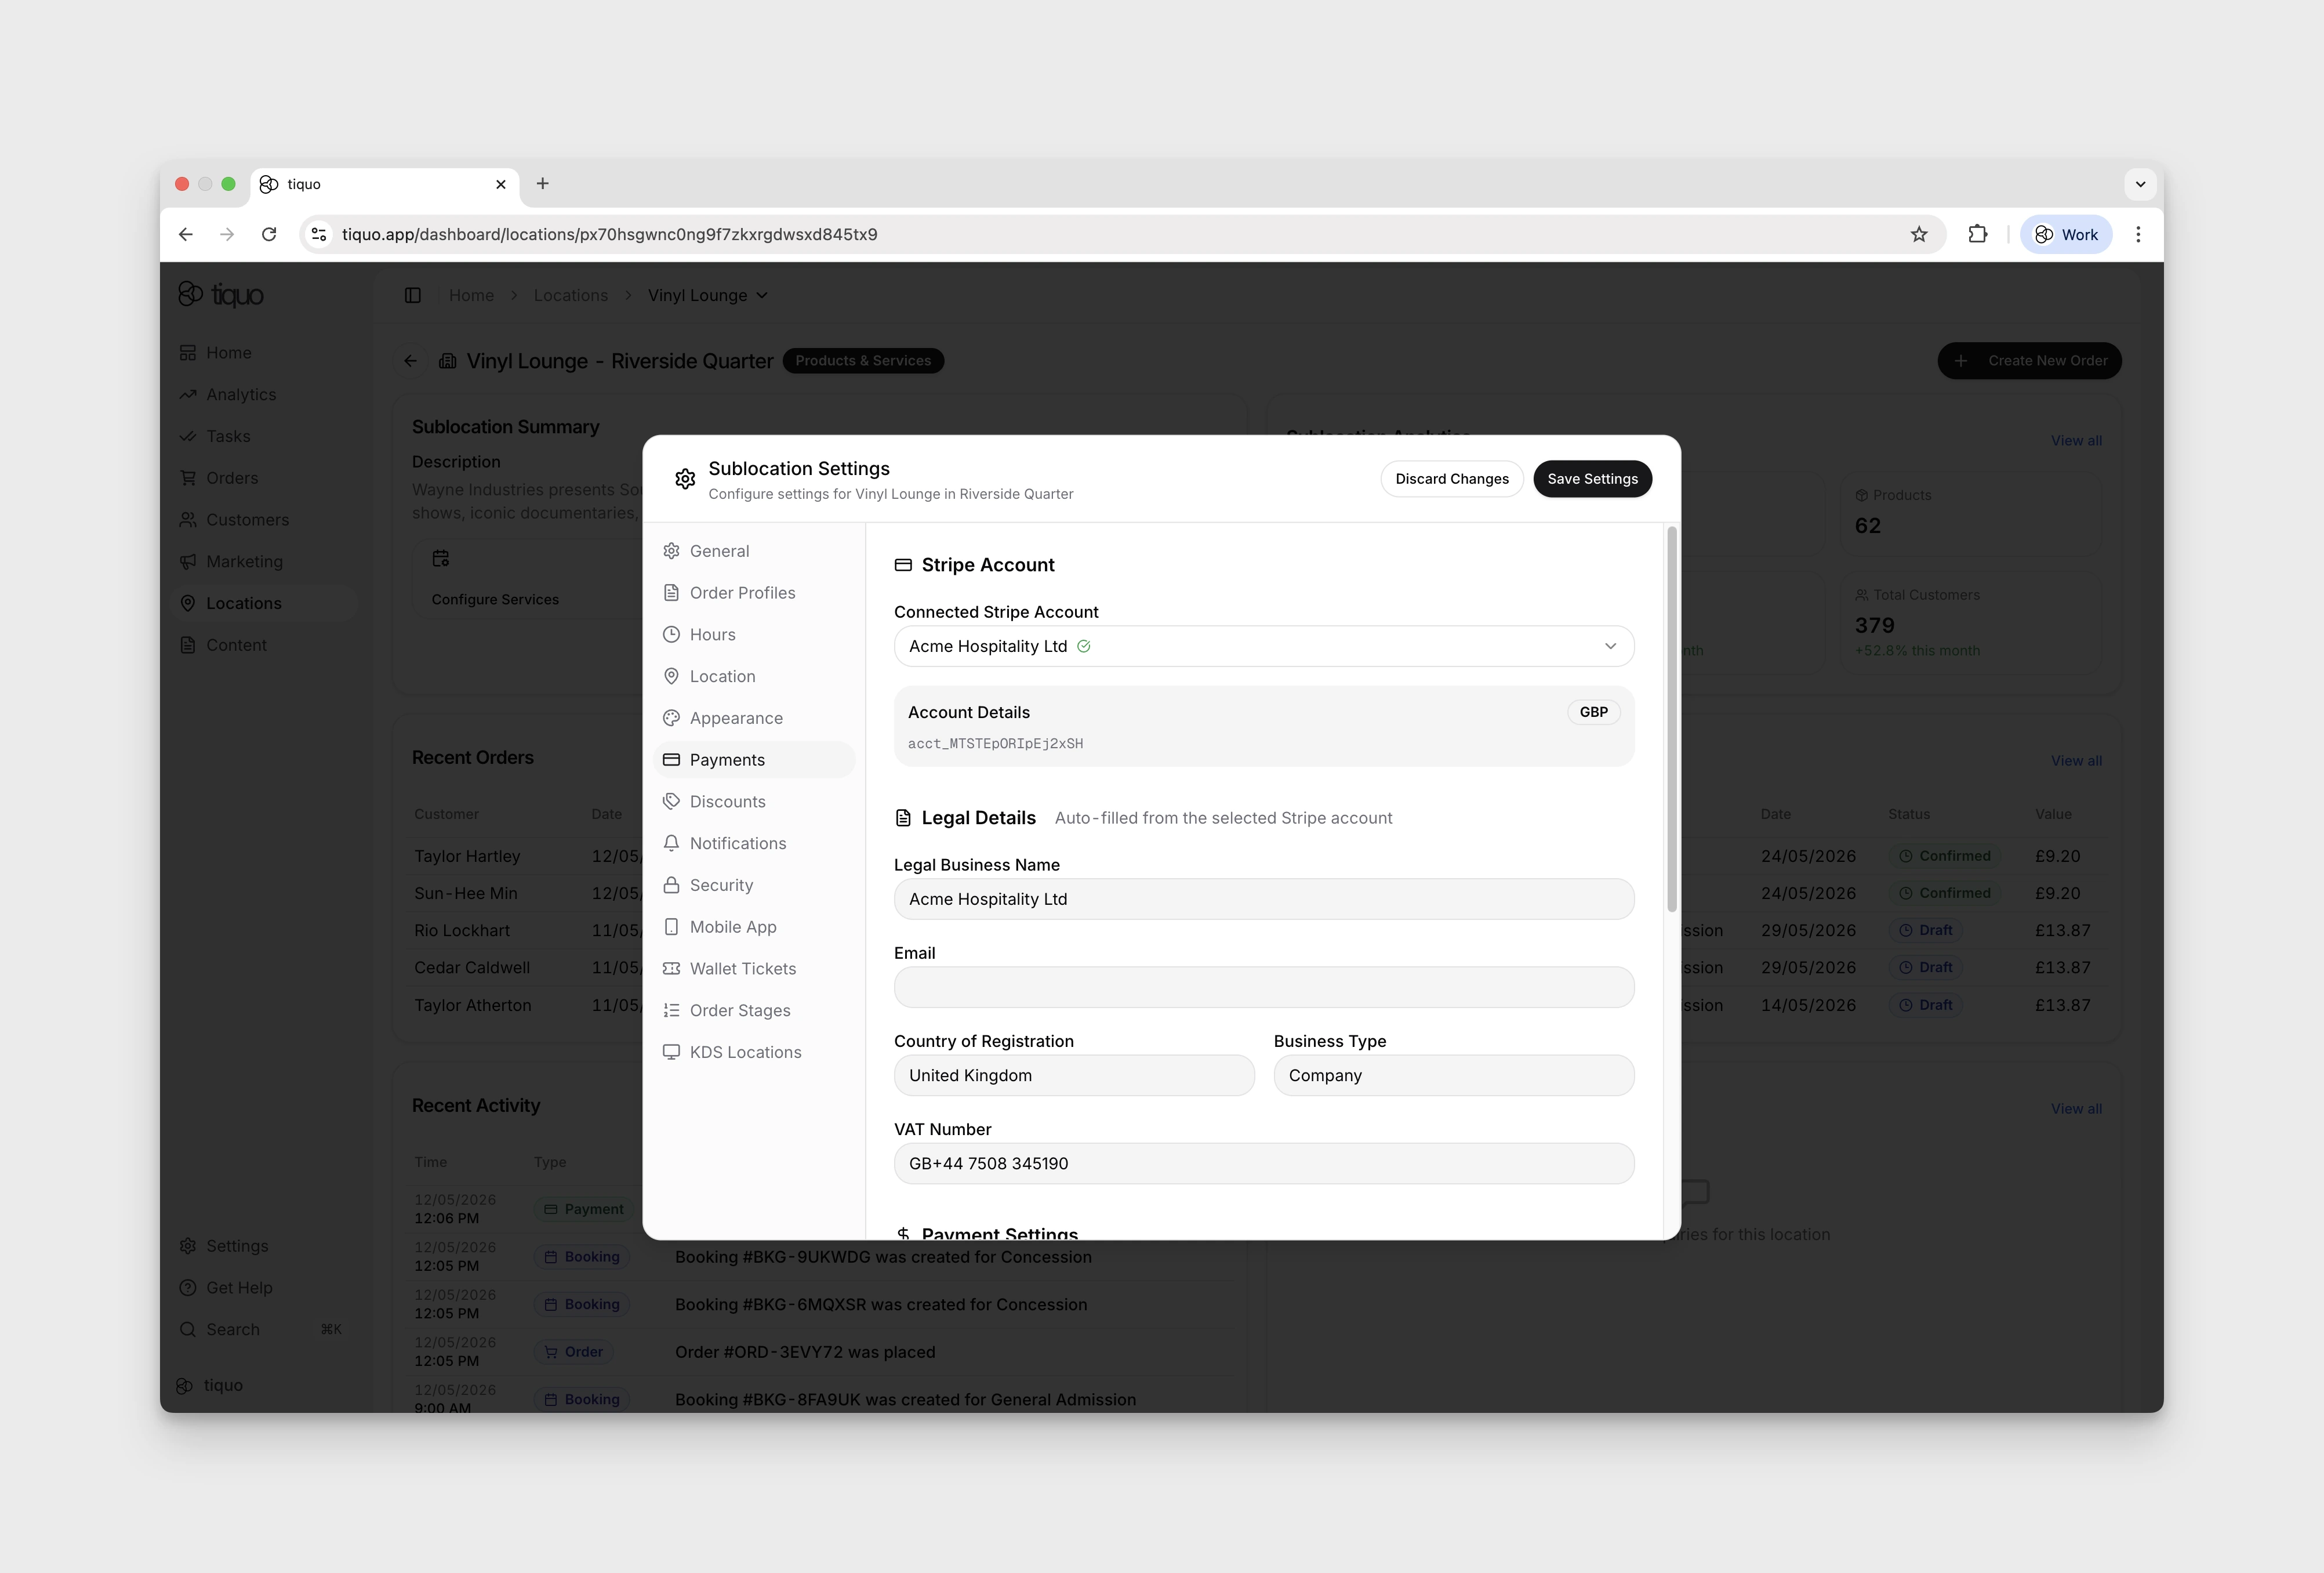
- Stripe Account: connect a Stripe account to enable payments. Legal Details auto-fill from the selected Stripe account. See Stripe account country.
- Invoicing (Spain): shown for sublocations in Spain. See Invoicing in Spain.
- Payment Settings:
- Tax Setting: Tax Inclusive or Tax Exclusive. Disabled until Stripe is connected.
- Split VAT by order type: different tax rates for takeaway versus eat-in orders.
- Split price by order type: different prices for takeaway versus eat-in orders.
- Require paid orders before booking checkout: the setting describes requiring settlement of unpaid associated orders before active-booking checkout in the dashboard and mobile app.
- Require deposit: customers pay a deposit when booking.
- Request tip for in-person payments: prompt customers to add a tip on the card reader.
- Service Charges: configure product-order and service-order charges separately. Each supports a base percentage plus optional threshold tiers that apply from a specified order subtotal. Thresholds are inclusive and are evaluated before discounts. A product service charge can be limited to open tabs, so immediate-pay orders do not receive it. For an order containing both product and service items, Tiquo applies the higher eligible percentage to the full pre-discount subtotal.
Stripe account country
A sublocation can only use a Stripe account registered in the same country as its parent location. The Connected Stripe Account list groups accounts under Accounts in the location's country and Other countries. Accounts in other countries are listed with a note that they are not selectable for this location, and cannot be chosen. Contact Tiquo if a sublocation needs an account from a different country.
Changing the connected account also needs the org.integrations permission. Without it, the list is read-only.
Invoicing in Spain
Receipts in Spain are simplified invoices, which are allowed up to €400. Some activities can issue them up to €3,000. Use What this venue sells (Spain) to set the limit for the sublocation:
- None of the listed activities (€400)
- One of the listed activities (€3,000), such as Retail sales of goods, Hospitality and restaurants (restaurants, bars, cafés and similar), Hairdressing and beauty salons, Use of sports facilities, or Vehicle parking
Until an activity is chosen, the setting shows Not chosen yet. In the meantime a products-only sublocation is treated as retail sales (€3,000) and any other sublocation uses the €400 limit. Memberships are always limited to €400, whatever the venue sells.
When a paid sale is above the sublocation's limit, it needs a full invoice that names the buyer. The order shows Buyer NIF needed until staff select Add buyer details and enter the buyer's name, NIF or NIE (or a tax number from another country), and address. The full invoice is issued as soon as the details are saved. Nothing is sent to the customer from this step.
Ordering channels
Ordering channels control how customers place product orders for a sublocation.
Common channels include:
- Order & Pick Up: customers order ahead and collect from the sublocation
- Order to Table: customers order from a table or service point inside the venue
Channels can be configured per sublocation, so one venue can support table ordering in a restaurant, pickup in a café, and staff-only ordering in another operational area.
Each channel can use the sublocation's operating hours or its own ordering hours. Use channel-specific hours when pickup or table ordering should open later, close earlier, or be unavailable on different days from the venue itself.
Preview a channel before saving it to check the name, behaviour, and connected products customers will see.
Product availability for these channels is controlled on each product. For example, a product can be available for in-person staff orders but hidden from Order & Pick Up, or available for Order to Table but not for pickup.
If a customer abandons an order before checkout, Tiquo restores stock from the lost cart where the product uses tracked inventory.
Customer ordering and live tracking
The customer-facing channel presents the active products and categories enabled for that channel. Customers can browse or search, choose variants and modifiers, review the basket, and complete checkout for the selected pickup point or table.
After checkout, the confirmation opens a live tracking page. The page shows the order reference, fulfilment location or table, items, totals, receipt, and progress through customer-facing stages such as Order received, Preparing, Ready to collect or Ready to serve, and Collected or Served.
Customers can share the secure tracking link and reopen recent tracked orders in the same browser. Anyone with the link can view the tracking page, so it should be shared only with the intended recipient.
Mobile app
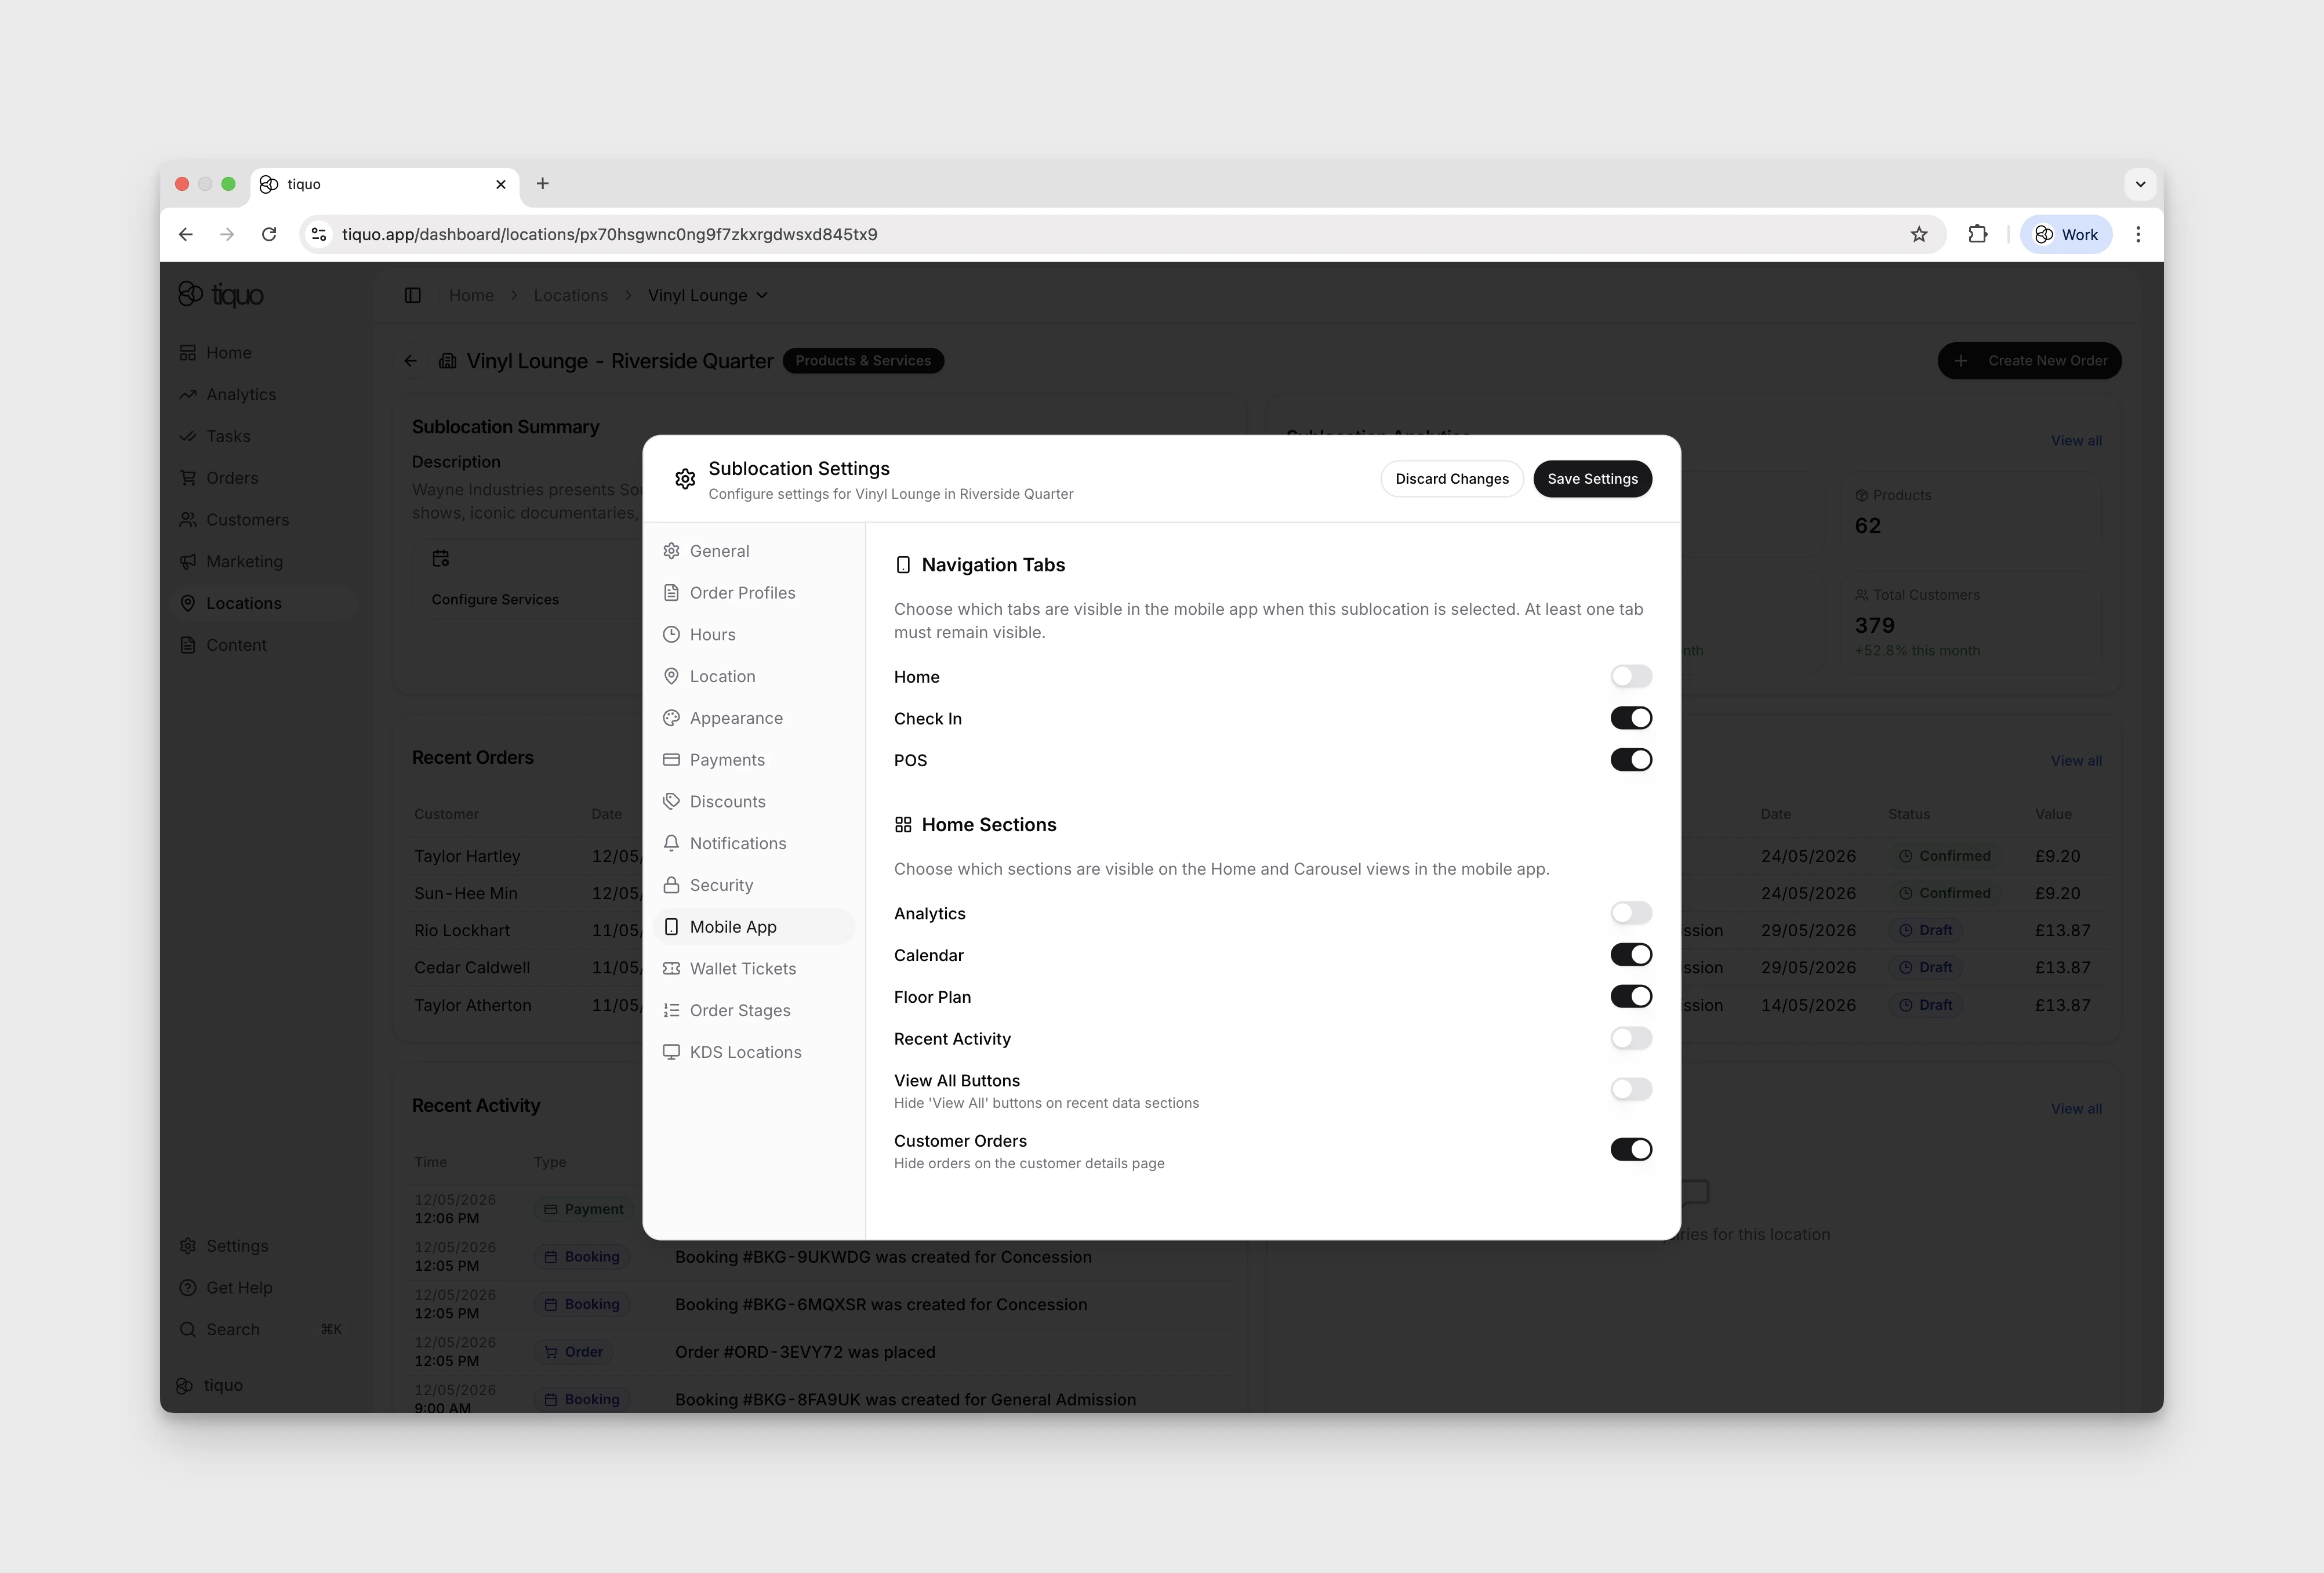
Controls what staff see in the mobile app when this sublocation is active. The use case is shared devices: when staff switch into this sublocation, hide the tabs and home sections that aren't part of its workflow.
- Navigation Tabs: Home, Check In, POS. At least one tab must remain visible.
- Home Sections: Analytics, Calendar, Floor Plan, Recent Activity, View All Buttons, Customer Orders. Any combination can be toggled off.
- Product Display: turn on Show product images to display product photos in the Add Products modal on the Tiquo App and Tiquo PDQ. Products without an image continue to use the standard product card.
- Product views: choose List and grid, List only, or Grid only. Selecting one view hides the staff view switcher; List and grid lets staff change view while ordering.
- Restaurant Mode: the default is configured under General > Order Creation. Product favourites selected for this sublocation appear prominently in Restaurant Mode for faster ordering.
KDS locations and printed tickets
Create KDS locations to route relevant products to the correct preparation area. A location can use a digital kitchen display or a supported physical ticket printer.
KDS locations are shared across all sublocations in the same parent location. Ticket layout settings apply only to the current sublocation.
For a physical ticket location, set Tickets per order from 1 to 10 when the preparation team needs multiple identical copies of every routed order ticket.
Void tickets decides what happens when staff void an item the kitchen already has: Print automatically (the default) prints a VOID ticket at its station straight away, Ask staff each time has the Tiquo App and Tiquo PDQ ask after each void, and Don't print sends the kitchen nothing. Voiding a whole tab still prints unless the setting is Don't print. See Void tickets.
The Assigned Printer picker on an Order Tickets location also lists cloud printers connected through the Tiquo App, with their host device, sublocation and online status. A printer marked Reconnect on its device to assign can't be picked until it is reconnected on that device.
Under Ticket layout, choose Small, Medium, or Large text independently for the header, order stages, and products. Top spacing adds blank paper before the header for ticket clips: None, Small (about 6 mm), Medium (about 24 mm), or Large (about 60 mm).
Add up to 20 kitchen message presets, with a maximum of 80 characters each. In Restaurant and Bar modes, staff can select a preset from the order's Info screen or enter a free-text message. Selected messages are included on the kitchen ticket.
Order stages
Order stages organise products into preparation courses or phases. Create, rename, and reorder the stages used by the sublocation.
Product categories can supply the default stage. A subcategory inherits its parent category's stage unless it sets its own. Turn on Stage selection on POS when staff should be able to override that default while ordering. Even when it is off, staff can move a saved line to another stage using the supported drag or swipe action.
Enable Allow holding and firing of stages when courses need controlled kitchen release. Tiquo creates a protected Direct Fire stage at the start of the list. Direct Fire always fires and cannot be removed, although it can be hidden from the POS. Other stages can default to HOLD or FIRE and can be overridden on an order.
For physical KDS tickets, choose one of two release flows:
- Print all items, then an Away ticket: the first ticket contains both FIRE and HOLD products. Releasing a held stage prints a line-free
STAGE AWAYticket. - Print FIRE items only: held products are omitted initially. Releasing a stage prints those products as
STAGE · FIRE.
SMS receipts
The SMS receipts section is on the General tab. Enable SMS receipts can be switched on once messaging is ready and a sender name is set. Until then, the switch stays off and the badge reads Messaging setup required or Sender name required. It reads Ready once both are in place.
Sender names are not set in Sublocation Settings. Both the organisation's sender name and each sublocation's own name are set under Settings > Messaging, in Branded senders and its Sublocation sender names list. A sublocation without its own name uses the organisation's. When SMS receipts are on, this section shows a read-only Receipts send as line with the sender name in use. Sender names, and so SMS receipts, are not available in the United States or Canada. See Sender names for the naming rules and permissions.
Staff send an SMS receipt manually from Tiquo App or Tiquo PDQ. Enabling the setting never sends receipts automatically. The customer receives a branded, secure link to a receipt PDF hosted on the customer-order domain.
Customer reviews
Customer review pages are in Private Preview and are shown only to eligible organisations.
Under Reviews, enable the hosted review page and choose a five-star or thumbs-up/thumbs-down experience. Written feedback is optional. Copy the hosted URL when it is ready to share.
Optional routing can send every completed review, or only selected ratings, to an external review destination. Secure review links can associate a response with its customer and relevant order or booking; anonymous reviews remain supported.
iCal links
Service-capable sublocations can publish selected booking calendars as read-only iCal subscriptions:
- Open iCal Links and create a link with a recognisable name.
- Select one or more active calendar or slot inventory items.
- Copy the subscription URL, or open it using the
webcalaction. - Add it to Apple Calendar, Google Calendar, Outlook, or another calendar application that supports iCal subscriptions.
Anyone with a subscription URL can view booking times, services, booking references, and the names and email addresses of customers associated with each booking or order. Notes and phone numbers are not included. Create separate links for different people or teams so access can be revoked independently, and revoke a link immediately if it is shared with the wrong person.
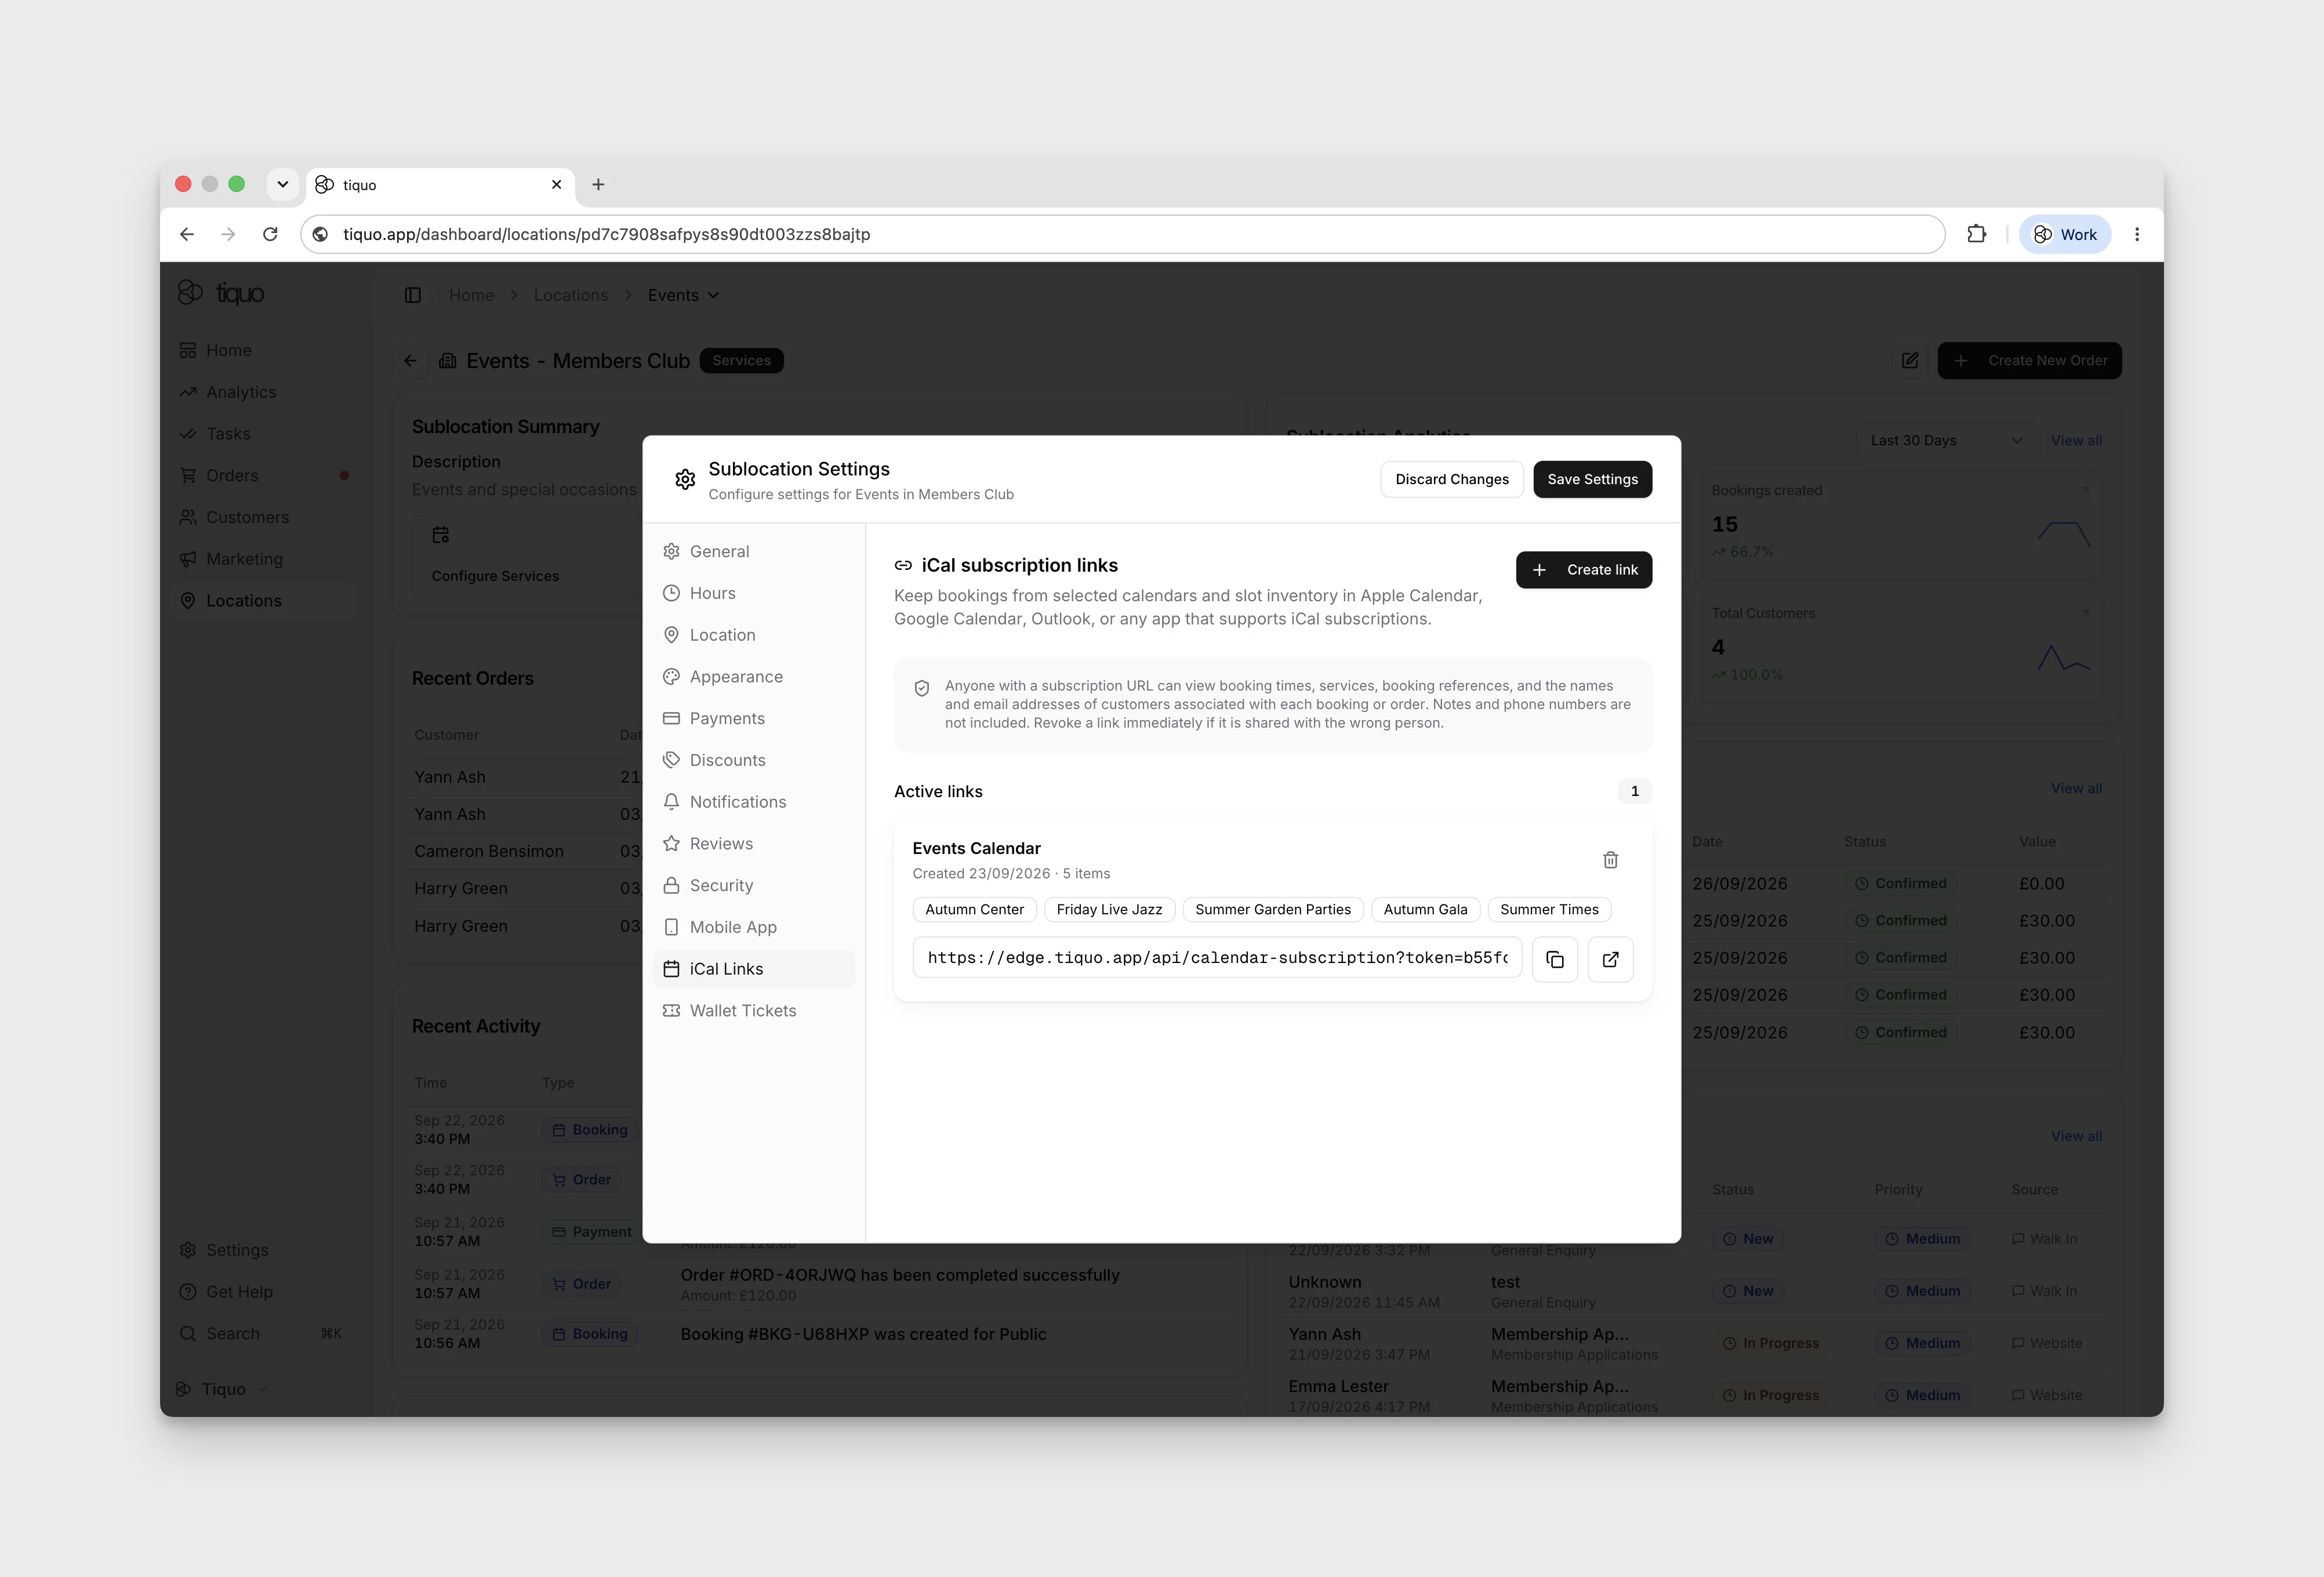
Revoking a link stops future access and updates immediately. Revocation cannot be undone; create and distribute a new link if access is needed again.
Wastage
Turn on Enable wastage for a product-capable sublocation to make Orders > Wastage available to staff. Saving a wastage record deducts tracked inventory; staff can leave it as an editable open wastage tab or close it to finalise the record. The selected reason and staff attribution are preserved. Turn on administrator approval when a permitted administrator must approve wastage before it is finalised.
Summary
Sublocation Settings is a modal-based configuration area opened from a sublocation's workspace.
The available tab count depends on the sublocation type, permissions, limited mode, and preview access. Timezone and currency are inherited from the parent location and cannot be overridden in this modal. Toggles for Floor Plans and Waiting Room sit on the General tab for service-capable sublocations.
Name-only tabs
Turn on Name-only orders in General > Order Creation to let staff open an order using guest names without creating customer profiles. Use this when staff need to identify a tab by name. Names take the place of a customer, company, table, or booking association.
See Restaurant and Bar POS for grouping dishes by person and merging tabs.
Kitchen screens and ticket timers
Under KDS Locations, a digital location can be an Expo screen. Expo sees the parent location's stations and manages whole-order delivery. Stations hand finished items to expo when an expo screen is configured.
An expo screen can enable Show printed order tickets. Those cards show items sent to physical Order Tickets locations. They are display-only, leave when the order is paid or closed, and do not confirm that paper was printed.
Set Amber after and Red after to change a live ticket's timer colour as it ages. Use whole minutes and set the amber threshold below the red threshold. Product Prep time (minutes) supports timing items in the same round so they finish together.